Dust shields
Precision linear rails and ballscrews are a great choice for CNC machines to minimize backlash. But they are easily damaged by metal chips, so dust shields are needed to keep the two apart.
Roller vs. bellows dust covers
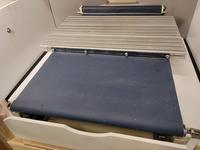
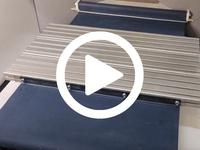
For the Y axis moving table, I made dust shields out of old roller shades. This horizontal surface is where most chips will land, so the flat surface of the dust shield is useful for easy cleaning. The rolling action also transports most of the chips to the ends of the table travel where they can be collected onto a tray.
In this design the X axis is always 30 cm above the cutter, so only lighter airborne dust ends up there. An U-shaped bellows type dust cover was the easiest to fit onto the existing structure.
Bellows dust covers can be bought online for about 50 EUR per meter, but there are also many ways to make them at home. I tried three basic methods and summarize my experience below.
Folding out of sheet material
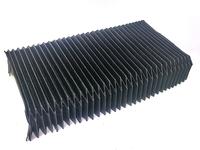
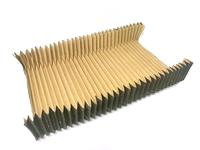
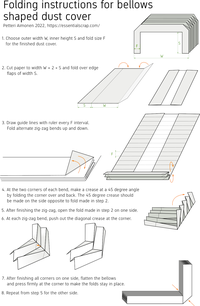
Bellows can be folded out of flat plastic or paper material. There are many folding patterns of varying complexity. The main difference is how far the bellows can be extended without the side walls bending too much inwards or outwards.
Frank Tkalcevic has a very useful bellows folding pattern generator that uses the pattern from patent US6054194A: Mathematically optimized family of ultra low distortion bellow fold patterns. This pattern is optimized to minimize the wall angle change with extension up to 90% of the flat material length.
In the Figure 7d of the patent, line 40 corresponds to classic double inversion pattern, line 41 to classic single inversion pattern and line 42 to the optimized double inversion pattern presented in the patent. The optimized pattern can be extended to 130° corner angle (90% extension) with the same amount of distortion that the single inversion pattern has at 60° corner angle (50% extension).
In view of material efficiency, the optimized pattern is very good. Unfortunately it is also quite difficult to fold, even with a printed pattern. In comparison the single inversion pattern is much easier and can be folded even without printed lines. The simplest method I've found is shown here (full size pdf).
The analysis of the optimized pattern also ignores the extension ratio, which depends on thickness of the bellows when fully folded. In practical use this is often very important, as it limits how close to the end of travel the carriage can move. The corners are always the thickest part of the bellows, as the material folds over itself multiple times. In single inversion patterns, there is twice as much material at the corners. For double inversion pattern the difference is quadruple. Thus even though the double inversion pattern can extend 1.8x times longer, it is also 2x thicker when fully folded.
As practical material choices I tried PET plastic film and thick construction paper covered in rubber spray paint. The PET film was too difficult to fold and didn't maintain shape very well. The paper was much easier to fold. With the spray paint applied it also looks very nice and seems sturdy, but it is also quite thick.
Sewing from individual pieces
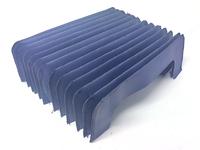
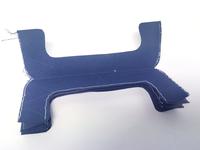
Another method is to cut C-shaped pieces out of fabric, and sew them together alternately on the inner and outer edges. To reduce the amount of sewing, two C's can be combined back-to-back. Cutting the pieces is easy enough by hand, though a laser cutter works great also.
This method has the advantage that sewn bellows hold their shape very well, as there are no folds that could be undone. The corners are same thickness as the center, so the bellows folds down to very thin stack. The side walls distort inwards when the bellows is extended.
The downside is that sewing takes quite much effort. I found it easiest to first sew the inner edges of all pieces and after that the outer edges.
Gluing from pre-folded blinds
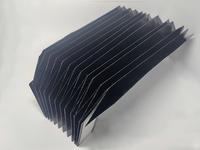
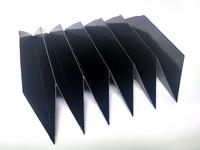
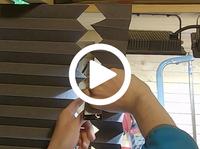
This Instructable by Flying_MashedPotatoes had the idea of using a prefolded window blinds as the base material. I found that Ikea sells Schottis blinds that are made out of polyester and have a slick, waterproof coating on one side. The premade folds are at 32 mm interval.
The basic idea is to cut pieces with diagonal ends and then glue them together. I found that contact glue works well for this, as it can be first applied to both surfaces and then immediately sticks together for up to an hour after application. This makes it easy to align the pieces accurately.
There are two basic ways to do the glue-up: alternating or aligned pattern. The alternating pattern is similar to the single inversion folded bellows: the crests and valleys alternate on the top and sides, and distortion happens outwards. The aligned pattern is similar to the sewn bellows: the crests and valleys on top and sides are aligned, and distortion happens inwards.
The alternating pattern is easiest to glue. The glue seams are always between the inside side of the material, which in case of the Ikea blinds is uncoated polyester fabric that glue sticks well to. The material can be cut to clean 45° angle and glued at the edges.
The aligned pattern, which is used in the Instructables, needs extra overlap at the corners for the glue seam. The extra overlap also means that the corners are equally thick as in the alternating pattern, and it doesn't fold as small as the sewn pattern does.
Comparison
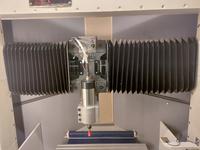
In all methods, the extension ratio depends on the material thickness and the fold interval. The larger you can make the fold interval, the thinner the stack of material is when fully folded, but the larger space it takes sideways. In the table below, F is the fold interval, n is the number of folds and T is the thickness of material.
| Method | Distortion direction | Maximum extension | Thickness when folded | Notes |
|---|---|---|---|---|
| Folded paper, optimized pattern | Outwards | 0.9 × F × n | T × 4n, T ≈ 0.1 mm | Needs printed pattern to fold |
| Folded paper, single inversion | Outwards | 0.5 × F × n | T × 2n, T ≈ 0.1 mm | Easy to fold |
| Folded PET sheet, single inversion | Outwards | 0.5 × F × n | T × 2n, T ≈ 0.1 mm | Waterproof, does not hold shape very well |
| Folded paper, single inversion, rubber coated | Outwards | 0.5 × F × n | T × 2n, T ≈ 0.5 mm | Tolerates splashes, not fully waterproof |
| Sewn fabric | Inwards | 0.7 × F × n | T × n, T ≈ 0.4 mm | Waterproof, good extension ratio |
| Glued blinds, alternating pattern | Outwards | 0.5 × F × n | T × 2n, T ≈ 0.3 mm | Waterproof, slick surface |
In the end, I went with glued approach because I needed the stack to be quite thin when fully folded. The sewn approach would have been great also but my sewing machine, skills and patience were not up to the task.
– Petteri Aimonen on 26.6.2022
