
Close-up lens for phone camera
 Blurry results without closeup lens.
I'm a fan of cheap mobile phones - they get a lot of wear and tear, and even though my phones tend to last many years I would be too afraid of breaking an expensive one. Overall I'm pretty happy with my Huawei Y360, but its camera lacks autofocus. This is especially annoying when trying to take a photo of a receipt or other text - it ends up too blurry to read.
There is a simple solution to taking close-up images with a non-autofocus camera - it's called a close-up lens. It is a simple convex lens, and because the main imaging is done by the camera's own lens, it can be of quite poor quality and still work fine. Thus I was able to make one out of acrylic using my CNC3020.
Design
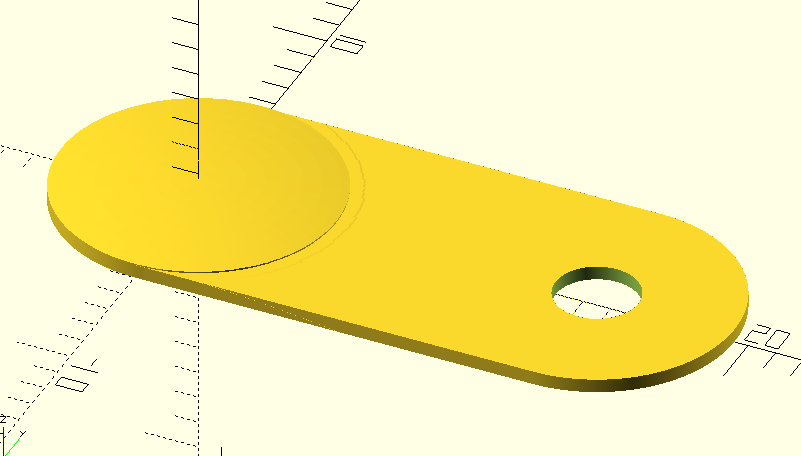 OpenSCAD design
I tested things out a bit, and figured that 10 cm would be a good distance between camera and the paper. The wikipedia page for close-up filters goes quite deep, but the basic idea is that the focal length of the close-up should equal the distance of the object. So I needed a lens with 10 cm focal length.
Refractive index of acrylic is about 1.5. The curvature of the lens surface can be calculated using the aptly named Lensmaker's equation: R = (n - 1) * f = (1.5 - 1) * 10 cm = 5 cm. So generating a sphere with 5 cm radius and cutting a piece of its surface should work.
The design was quick to make in OpenSCAD. For the final export, I increased the accuracy parameter $fn to 500 - this made rendering pretty slow, but should give good enough surface smoothness. In case you are interested, the design file is here.
Cutting
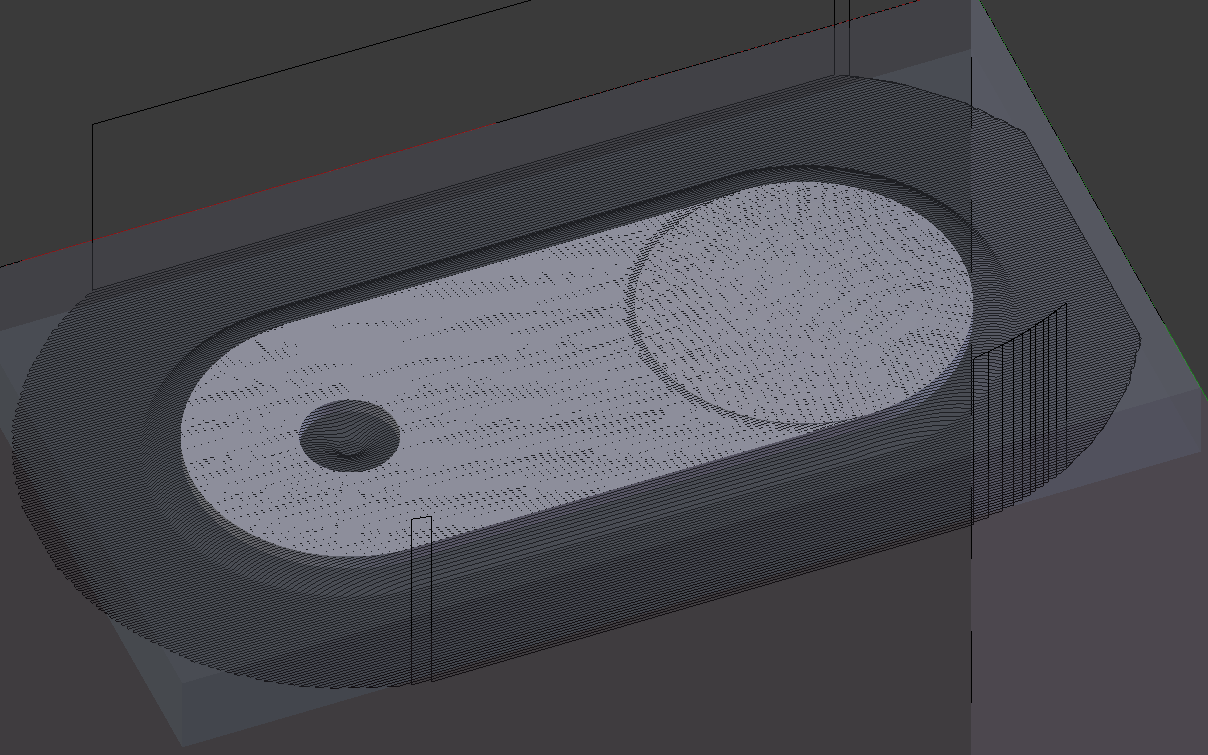 Blender CAM generated path
For generating the cutting path, I used Blender CAM. I chose the "parallel" cutting path strategy, with 0.1 mm spacing. The cutter I used was 3.2 mm ballnose cutter, with 10 000 RPM spindle speed and 1 000 mm/min feed. Because the cutter is only cutting 0.1 mm wide area of plastic at a time, it can easily cut to the whole depth of a 2 mm thick acrylic piece in one go, so I didn't have to use any layering / step down.
I've previously found out that doing two-step rough/fine milling does not seem to increase acrylic cutting quality on my mill at all, so I only did a fine pass here. I used soap water for cooling and lubrication because acrylic tends to overheat and melt very easily. The cutting took only 6 minutes to complete.
Polishing
 Polishing supplies
I first sanded away the cutting marks using 1200 grit wet sanding paper. Then I polished the lens with "Displex display polish" paste, which is meant for polishing scratched display screens. Not sure about the actual contents, but it is a white paste and makes a quick job of polishing acrylic. A few minutes of rubbing by hand is enough.
Attachment on the phone
 Attached on the phone
I superglued a small bit of acrylic rod to the hole in the lens. For some reason, the wallet case for my phone has this extra circular hole which doesn't seem to be used for anything, so I made the lens to fit into it. I enlarged the hole a bit, until the acrylic rod was a snap-fit into the hole. It keeps the lens in place, and the lens is thin enough to stay attached even when not in use.
Results
 Much better, even though at the edges there is still some blurring.
The improvement in image quality is significant, if you compare to the image in the beginning of the article. There is still a bit of blurriness at the edges - probably due to some asymmetries in the lens.
I've made a few lenses for LED lamps also, and it is pretty easy to get this level of results. However, these lenses are in no way accurate enough to use as the primary lens in a camera.
It should be possible to more accurately gauge the lens quality using Foucault knife-edge test, but I haven't got it to work yet for some reason. Probably because the reflection from a transparent lens is quite dim, compared to a mirror.
– Petteri Aimonen on 9.4.2017