
Magnetic toy car city
A few years ago my sister mentioned a model train exhibit they'd seen, where cars moved on streets by themselves. I can only guess at the mechanism, but I think it might involve magnets. This project is a simple implementation of the concept - gears move magnets under the surface and cars follow them along a track.
Design
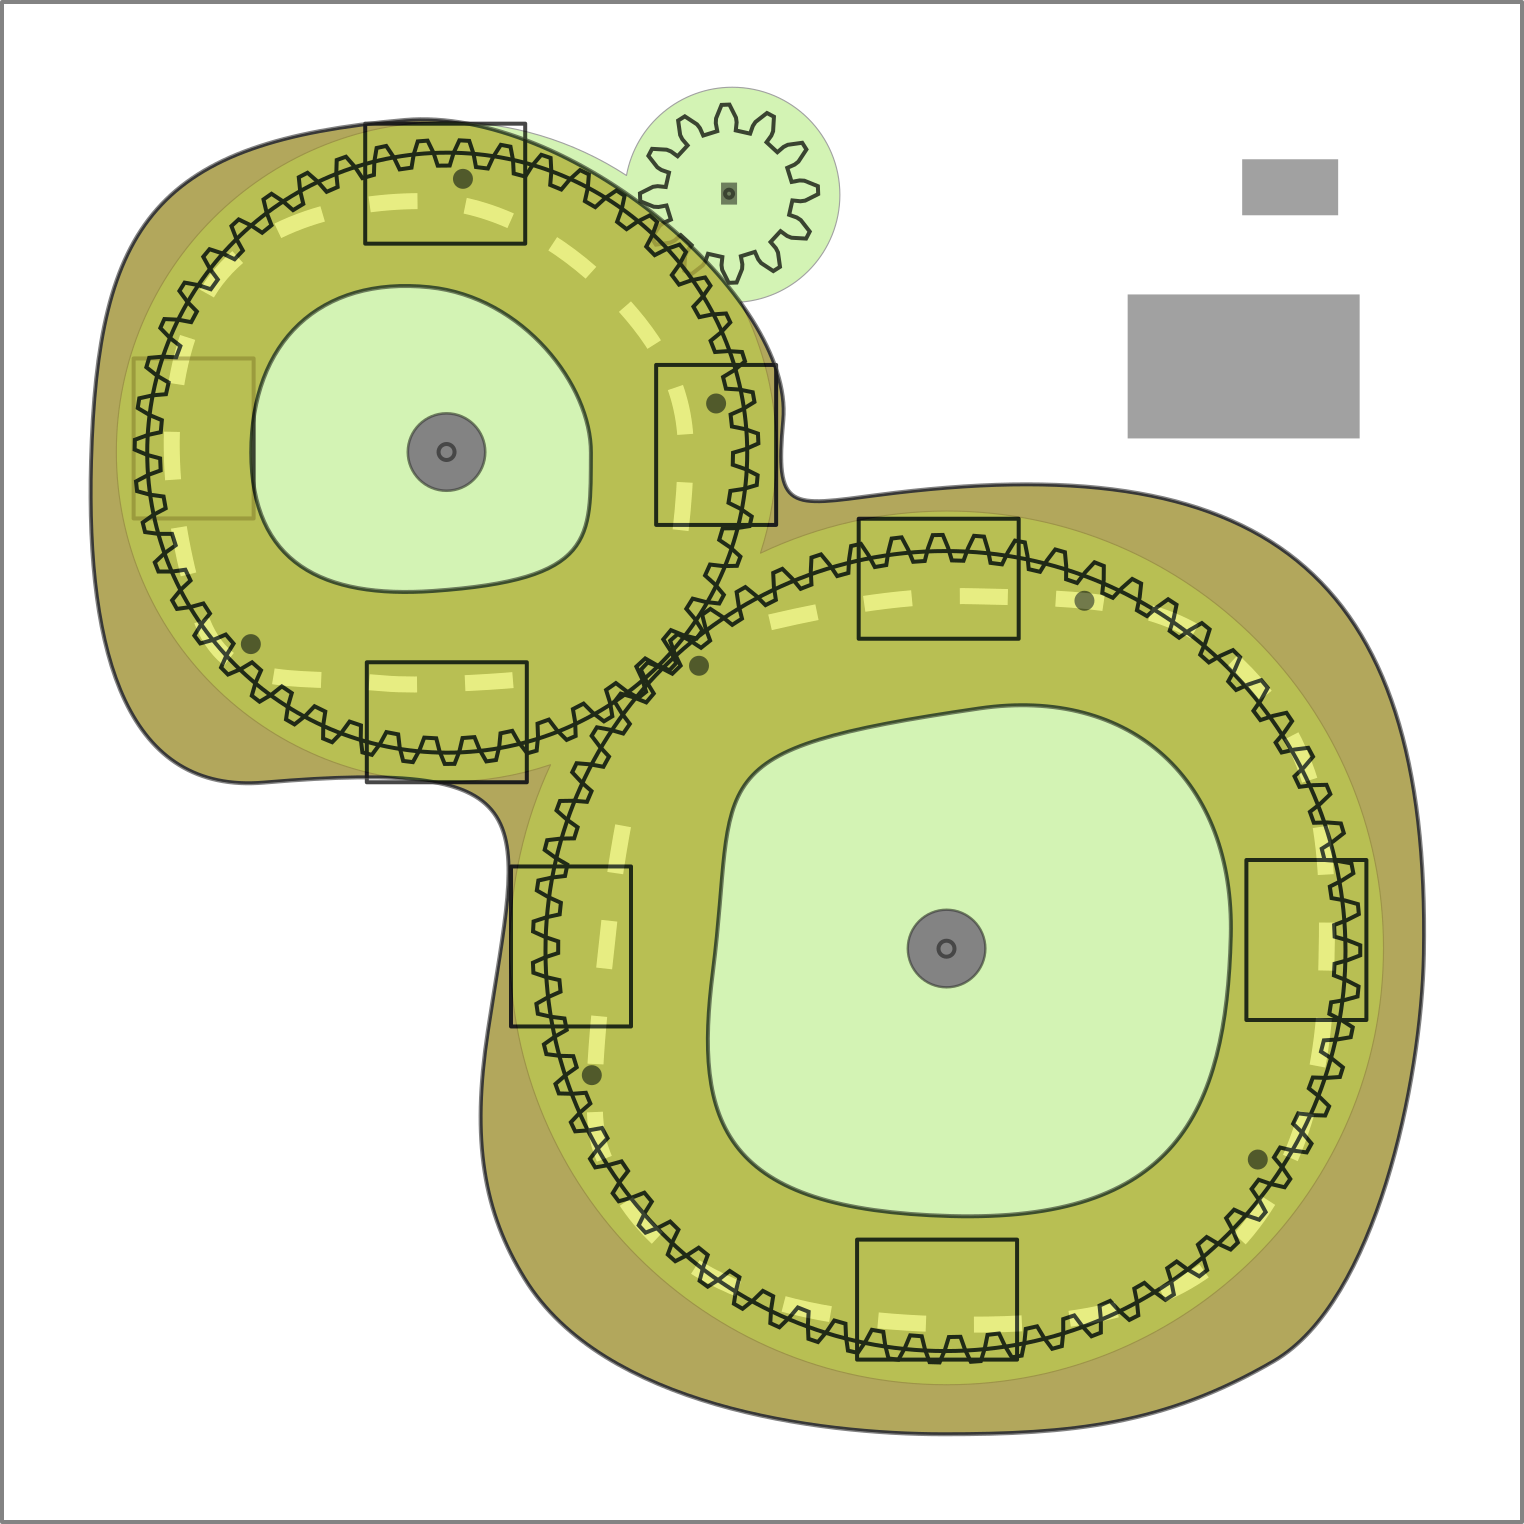
The basic design was planned in Inkscape. Its handy gear generator plugin made this quite easy. I chose coprime tooth counts for the gears to maximize the period when they end up in the same orientation. In addition the magnets are placed at non-symmetric positions so that the cars don't move too predictably.
Originally I planned to use small 5 mm magnets, but they turned out to be too weak to move the cars. I then substituted bigger 20 mm magnets, but this required moving the magnets further away from the gear perimeter. Unfortunately this means that the cars won't switch lanes in the intersection.
When testing with 5 mm magnets and some washers, the lane switching worked nicely. So for a future version it might be worth it to use a thinner piece of material between magnets and cars, to make it possible to use smaller magnets, to make it possible to place the magnets close to the teeth, to make it possible for the cars to jump from one magnet to another.
Making
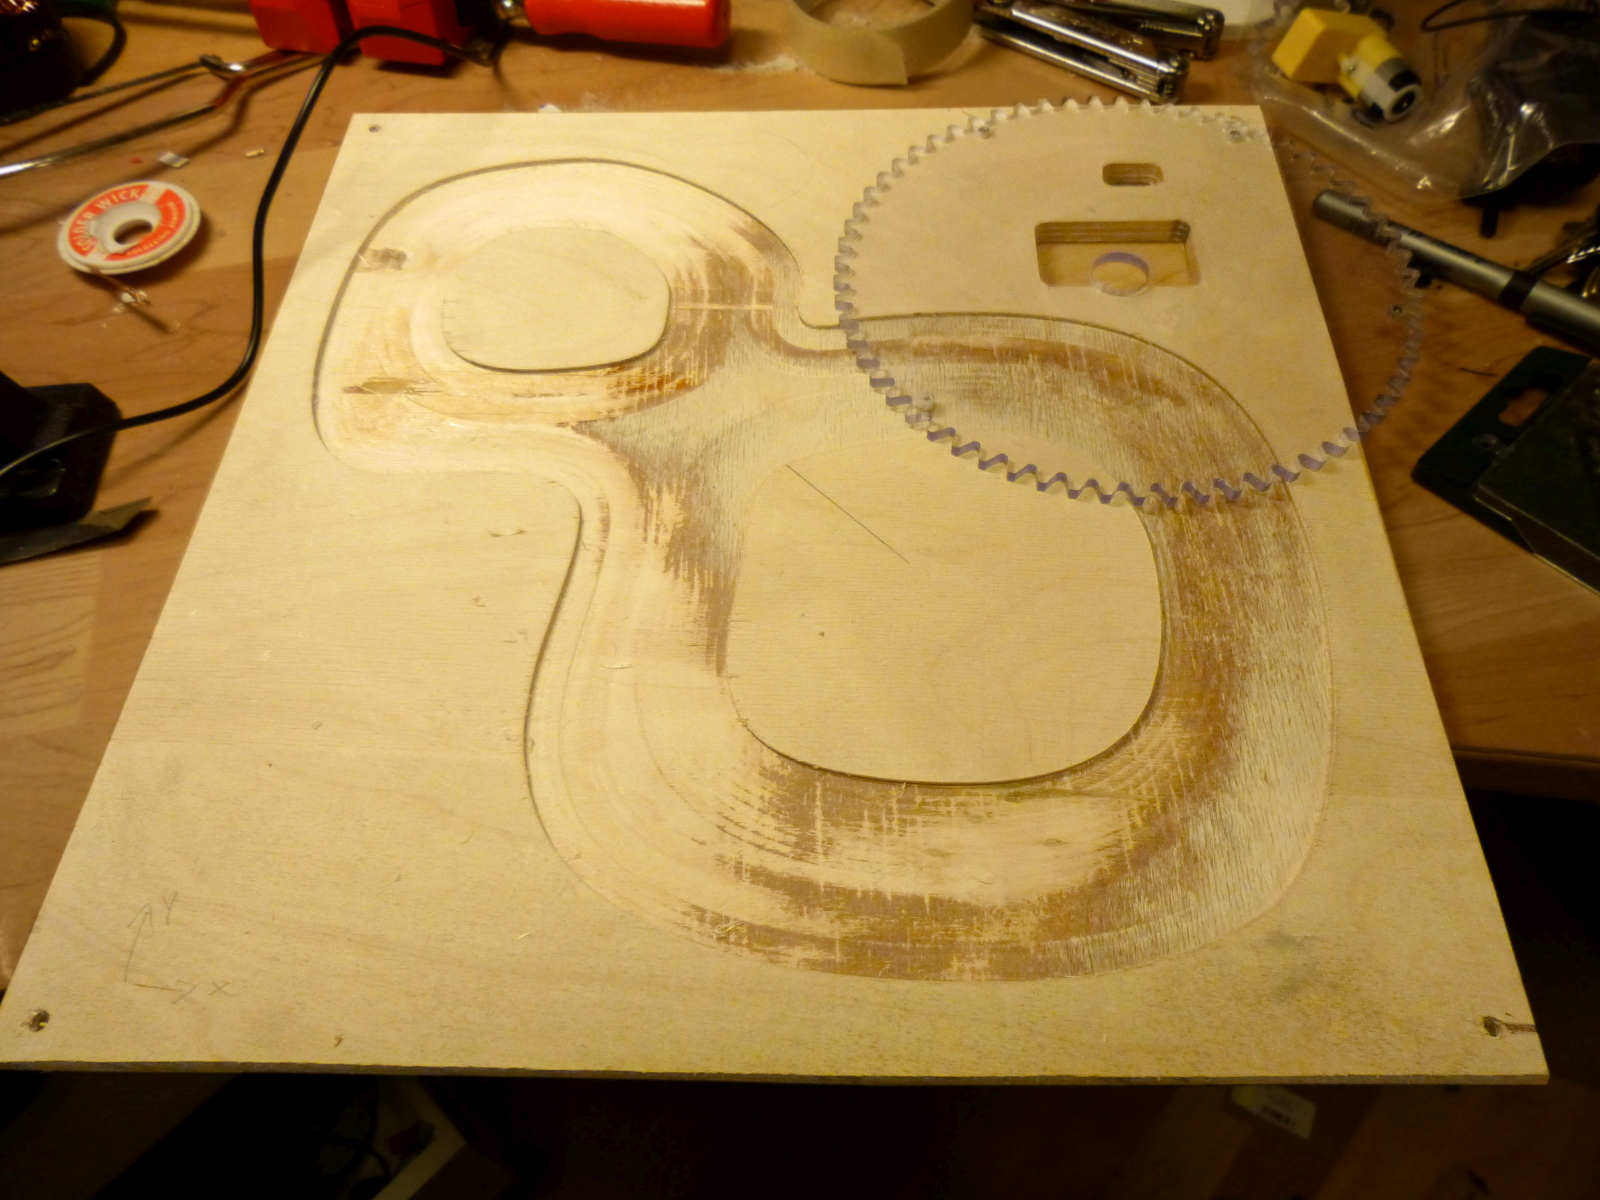

The base and the gears were cut with our DIY CNC router at the local hacklab. The piece of plywood I used turned out to be quite poor quality and warped a lot after the cutting. I later had to add an extra piece of plastic in between to provide more clearance for the gears.
The motor is a basic geared motor. It couples to a small gear, which provides some further speed reduction to the larger gears. An interesting property is that the speed at the perimeter of each gear is the same, independent of the radius, so all the cars move at the same speed.
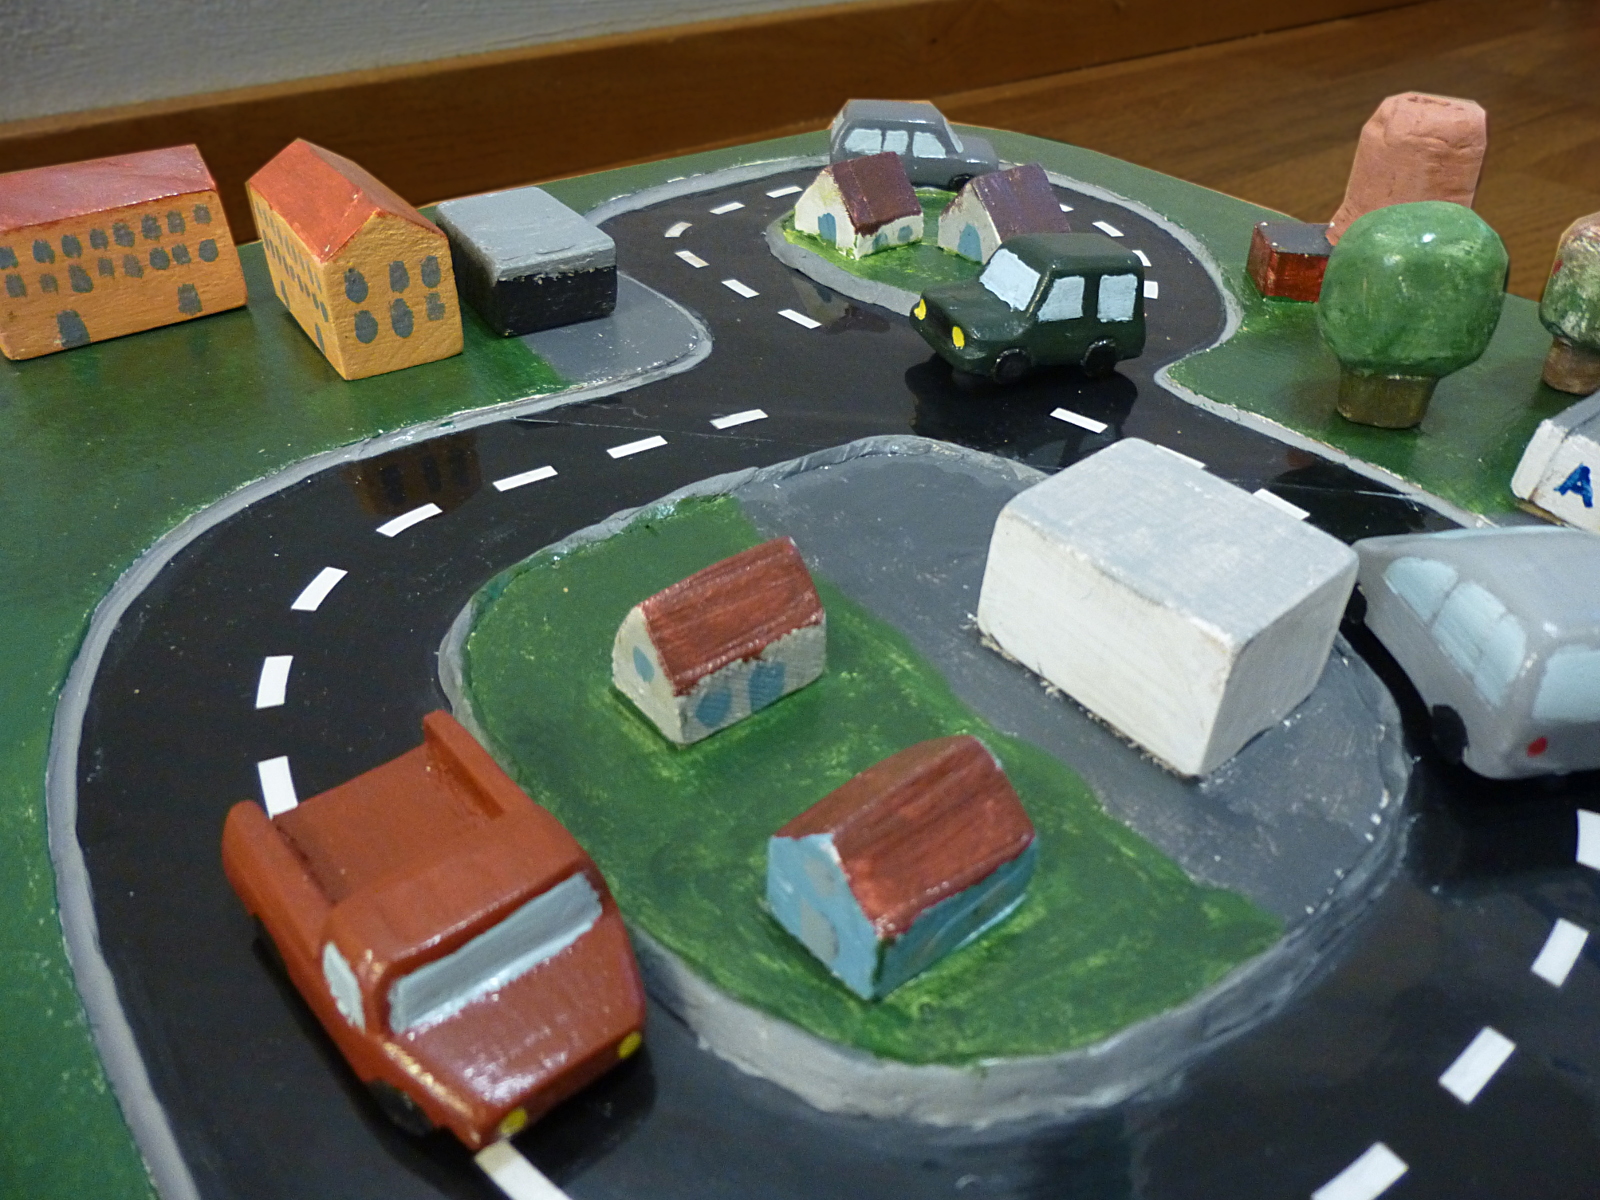
I made the road surface with laser printed transparency film. The film was printed twice to give a deep black surface with small gaps for the road centerline. The plywood surface was painted white, and the transparency glued on top with ink side down. The white paint shows up nicely through the transparency and the plastic surface should last quite long before the color starts to wear.
Buildings and surroundings were designed loosely after the neighbourhood my nephews live in. Some of the buildings are on wooden dowels so that they can be moved around or played around with separately. On top of the gears I couldn't use dowels and had to glue the buildings in place. In retrospect I could have made the center holes of the gears much larger. This would have left more plywood intact, making the structure stronger and allowing dowels everywhere.
Cars were made sawing and sanding by hand and with Dremel. To aid the movement, I installed small Teflon strips on the bottom. A small screw provides enough surface for the magnet to grab. Larger screws caused jerky movement because of too much force pulling them down against the surface.
Video
If your browser does not support WebM for video, you can either watch on YouTube or download the video.
Afterthoughts
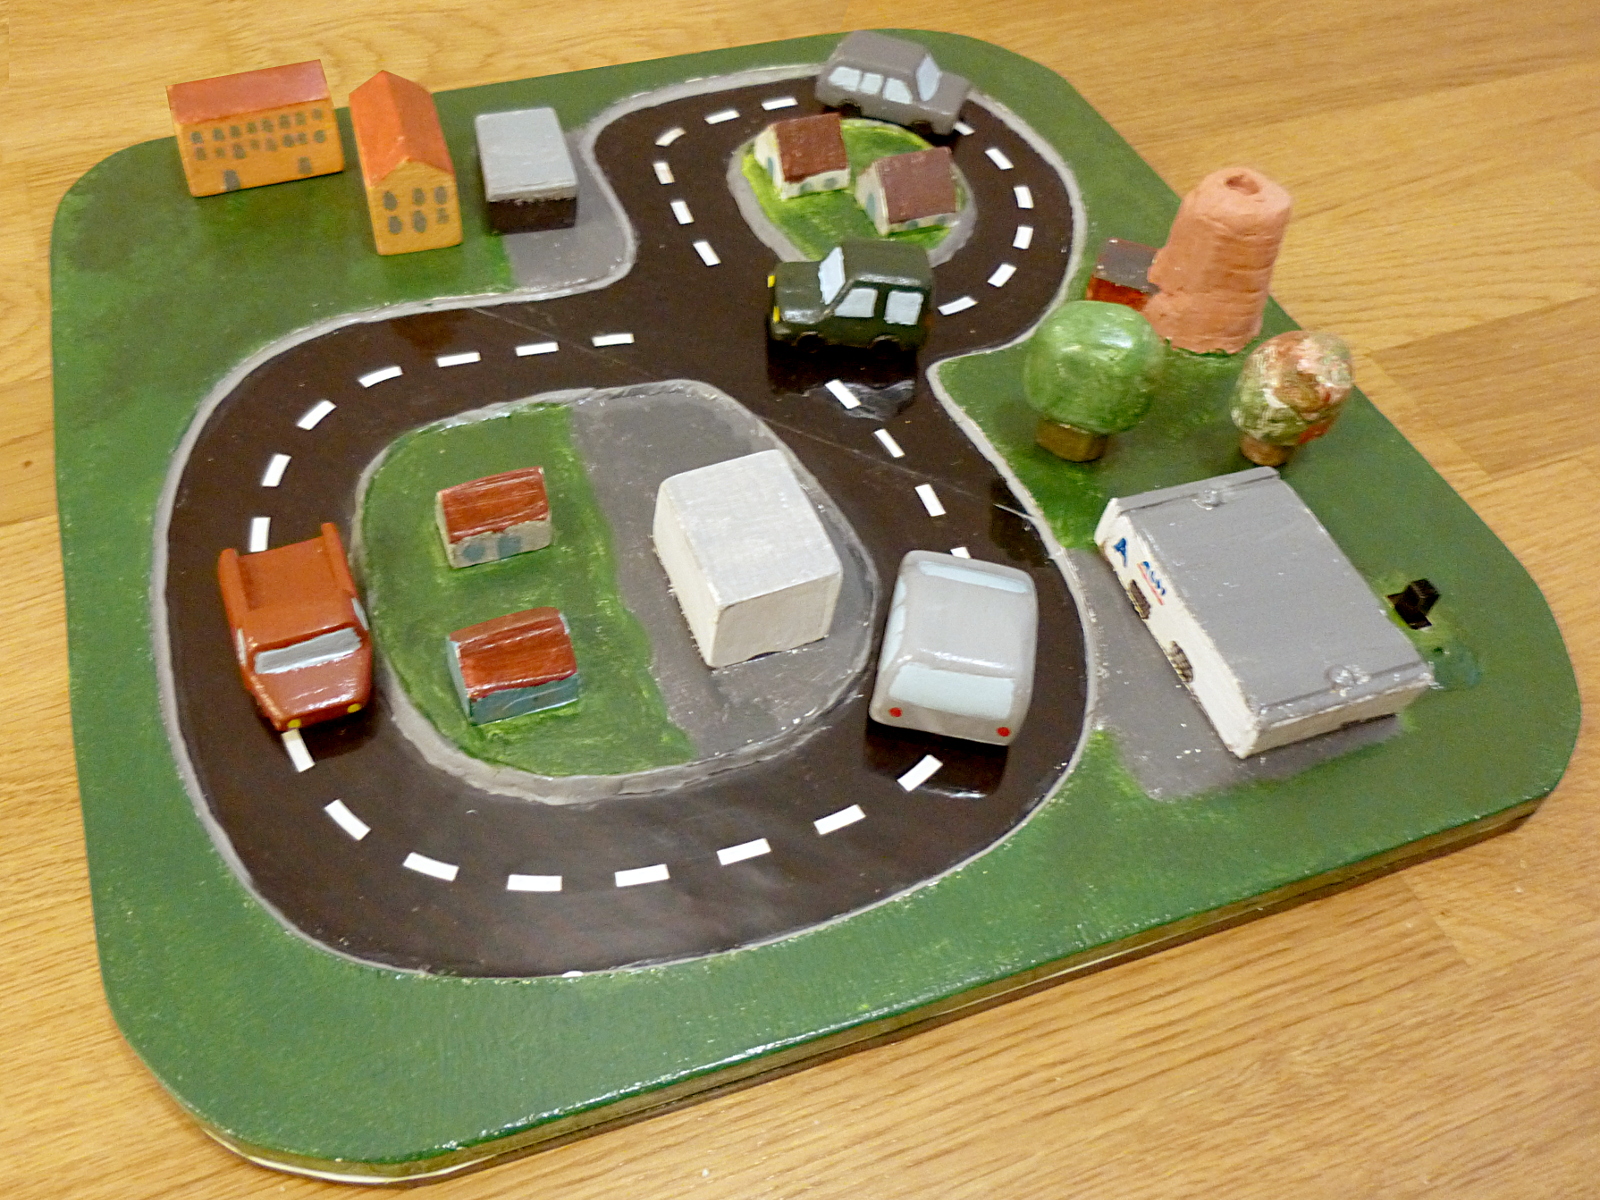
I gave the car city as a christmas present to my 2 year old nephew, but it turns out it was his 1 year old brother who really liked it. All the parts are designed to EN71 standard dimensions, so it should be quite safe.
The children also discovered a surprise feature. I had disguised the motor as a chimney, leaving a hole in the middle. Small fingers can fit down the center hole and press down on the motor axis, providing an intuitive speed control for the toy.
– Petteri Aimonen on 16.1.2018